Connect Amazon SES
The cheapest way to send (~$0.10 per 1,000 emails). About 20 minutes, one time.
Amazon SES is the lowest-cost provider — about $0.10 per 1,000 emails. It's a little more technical because you set it up inside the AWS console, but this guide walks you through every click.
SMTP settings at a glance
| Setting | Value |
|---|---|
| Server | email-smtp.<region>.amazonaws.com (e.g. email-smtp.us-east-1.amazonaws.com) |
| Ports | 587 (STARTTLS, recommended) · 465 (SSL) · 2587 · 2465 · 25 |
| Username | Your SES SMTP username (generated in Step 2) |
| Password | Your SES SMTP password (generated in Step 2 — shown once) |
Credentials are per region. Use the same AWS region everywhere (e.g.
us-east-1).
What you need first
- An AWS account — free at aws.amazon.com.
- A domain you own and access to its DNS.
Step 1 — Verify your domain in SES
- Sign in to the AWS Console and search SES.
- Pick your Region (top-right) and remember it — e.g. US East (N. Virginia) us-east-1.
- Left menu → Configuration → Identities → Create identity.
- Choose Domain, type your domain, leave Easy DKIM on, and click Create identity.
- SES shows 3 CNAME records. Add them at your domain's DNS host. (Verification can take up to 72 hours, usually much less.)
When the identity shows Verified, DKIM is done. See Verify your domain for what these records mean.
Step 2 — Create SMTP credentials
- In SES, left menu → SMTP settings.
- Note the SMTP endpoint shown (e.g.
email-smtp.us-east-1.amazonaws.com). - Click Create SMTP credentials → an IAM screen opens → keep the suggested name → Create user.
- Click Show to reveal the SMTP username and SMTP password, then Download .csv.
⚠️ The password is shown only once. Save the file now — if you lose it, you delete the user and make a new one.
Step 3 — Leave the SES sandbox
New SES accounts are in a sandbox: you can only email verified addresses, capped at 200/day. To email anyone:
- In SES, open the Account dashboard banner → Request production access → choose Marketing, describe your use, and submit. Approval is usually quick.
Step 4 — Paste into Mailbo
- In Mailbo: Settings → SMTP & sending.
- Click the Amazon SES (SMTP) tile.
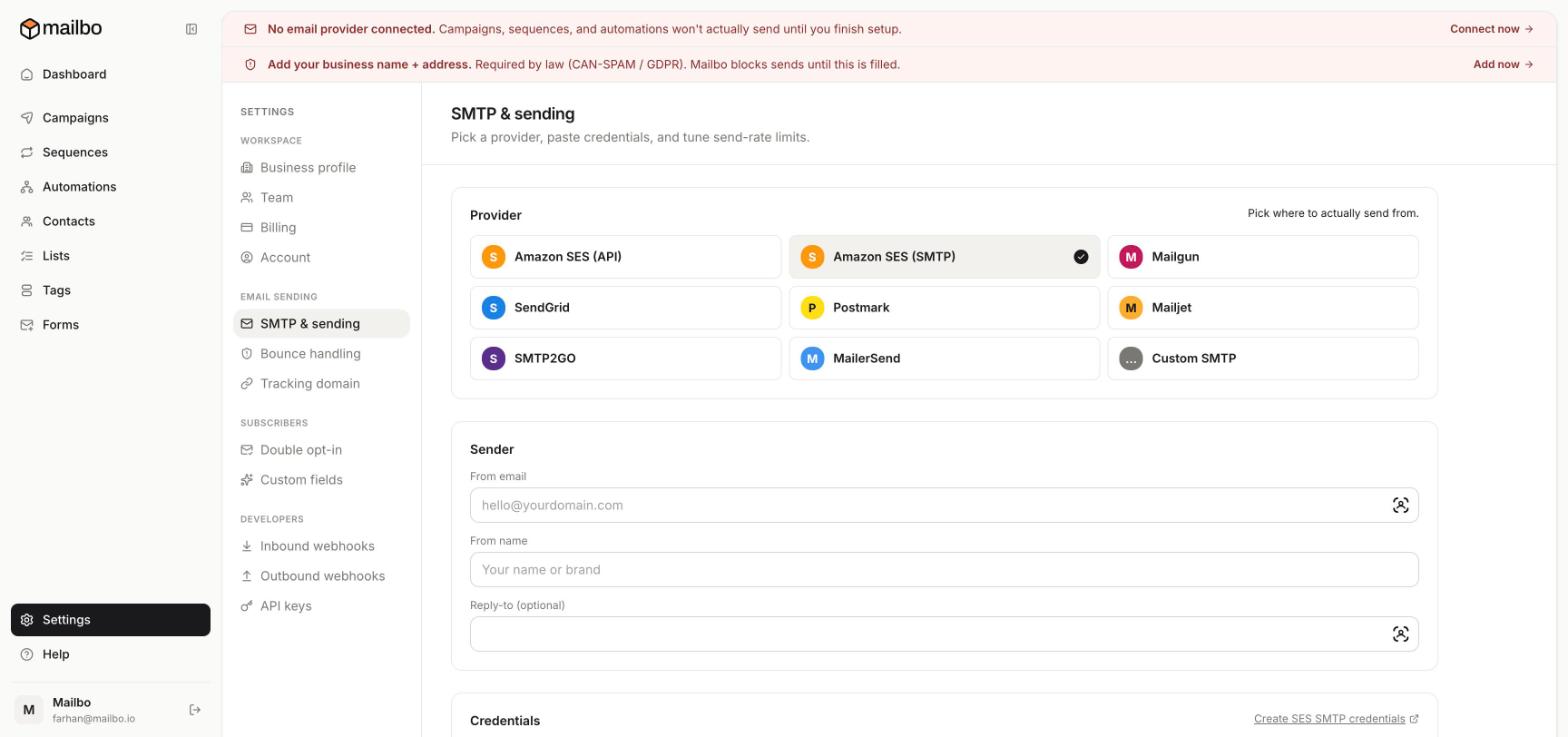
- Sender: set From email (an address on your verified domain, e.g.
hello@yourbrand.com) and From name. - Credentials: choose your AWS region, then paste the SMTP username and SMTP password from Step 2.
- Click Save.
Step 5 — Send a test
Use Send test email on the same page. If it arrives, you're done — the red banner on your dashboard disappears. 🎉
Troubleshooting
| Problem | Fix |
|---|---|
| "Email address not verified" | You're still in the sandbox (Step 3), or From email isn't on the verified domain. |
| Auth fails | Credentials are per region — make sure the region in Mailbo matches where you created them. |
| Test never arrives | Confirm the domain identity shows Verified in SES. |