Add your business name and address
A legal must-do — Mailbo blocks all sending until this is filled in.
Before Mailbo lets you send a single email, you must add your business name and a real postal address. This isn't optional: anti-spam laws (CAN-SPAM in the US, GDPR in the EU) require every marketing email to include the sender's physical address, and it appears automatically in your email footer.
It takes two minutes.
Steps
- Click Settings in the bottom-left of the menu.
- Under the Workspace heading, click Business profile.
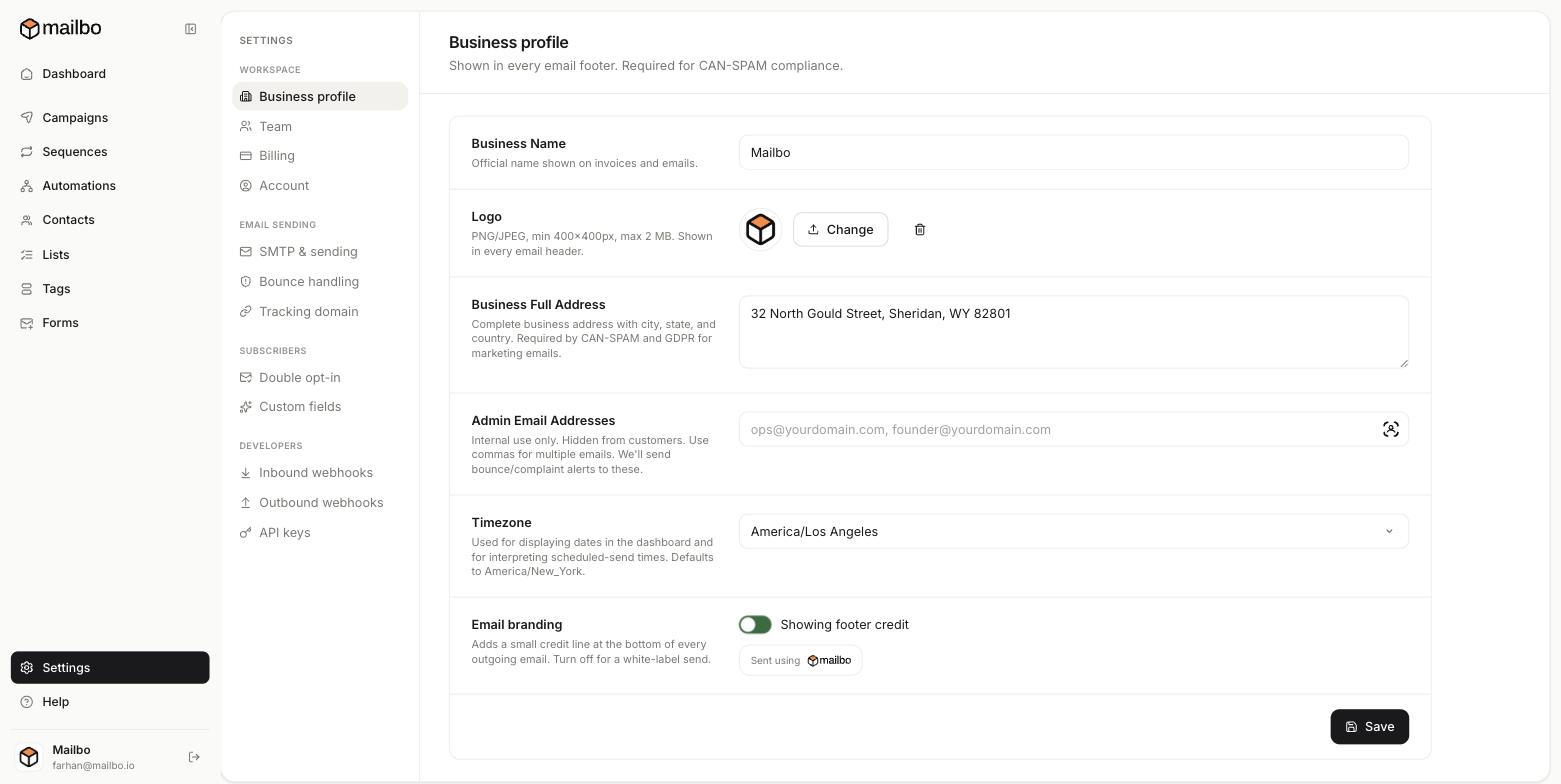
- Fill in the fields:
- Business Name — your official name. Shown on invoices and in your emails.
- Business Full Address — a complete postal address with city, state and country. This is the legally-required part.
- Logo (optional) — a PNG or JPEG, at least 400×400px, max 2 MB. Shown at the top of every email.
- Admin Email Addresses (optional) — internal only, hidden from customers. Mailbo sends bounce and complaint alerts here. Separate multiple emails with commas.
- Timezone — used for the dashboard and for interpreting scheduled send times. Set this to your own timezone so "send at 9am" means your 9am.
- Click Save.
The red "Add your business name + address" banner disappears once saved.
Good to know
- Email branding — there's a toggle here for a small "Sent using Mailbo" credit line in your footer. Turn it off for a fully white-label send (available on paid plans).
- Use a real address. A PO box is fine; a fake address can get your emails flagged as spam and breaks the law.
Next: connect a sending provider, then send your first campaign.
Still have a question?
Can't find what you need in this guide? We're happy to help.
Last updated 6/15/2026← More in Getting Started